
Things you will need
1.A dresser! check out yard sales or thrift shops to find a dresser you think could use a good makeover. Plus it's much cheaper to find a piece of furniture for a project at a yard sale or thirst shop!
2.Paint! I bought my can of paint at Walmart for under $10 I used onyx black in satin
3.Paint brush or rolling brush (depending on what effect you want your dresser to have the technique will matter!) rolling it will give it a smooth glass finish and brushing will give it the stroke look and texture
4.Sander or sanding block
5. A rag to clean
6.Acrylic paint or craft paint must be permanent!
Okay are you ready to begin!?
Step 1 take your dresser apart all the knobs and handles need to be removed also remove the drawers.

Step 2
SANDING! This step makes a big mess so do this outside! Sand all the sides that are going to be painted. Don't go too crazy we aren't turning your dresser into a toothpick! Just get the shiny coat off so the new paint will stick better.

Step 3
Wipe your furniture with a clean rag get off all the debris from sanding if you skip this step you will have a hard time painting!
Step 4
PAINT! using your roller or your brush apply the paint use a light coat let it dry if it needs another WAIT for it to Dry before you add another coat! The thinner the coat the quicker it will dry!

Step 5
Once everything is dry move it back into the house and reassmble your dresser add the finishing touches with your craft paint
Step 6
add your knobs and handles
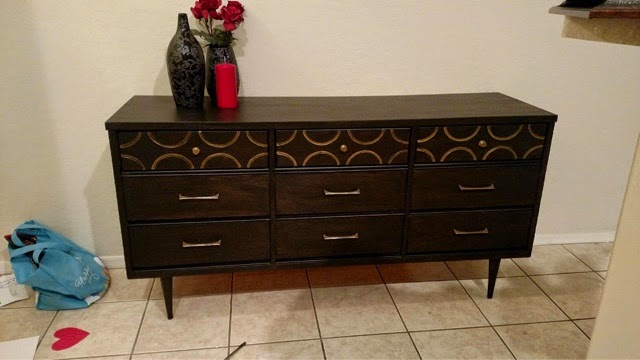
DONE! Congratulations you have a new piece of furniture that matches your unique style! I used mine as a buffet table and I store my nice China and wine glasses in the drawers! I hope you enjoyed this project please like comment & share 😘
No comments:
Post a Comment